Similar to other software, Nvidia utilities may experience occasional bugs. One common issue users might face is the Geforce Experience installation process becoming stuck at the “Preparing to install” stage.
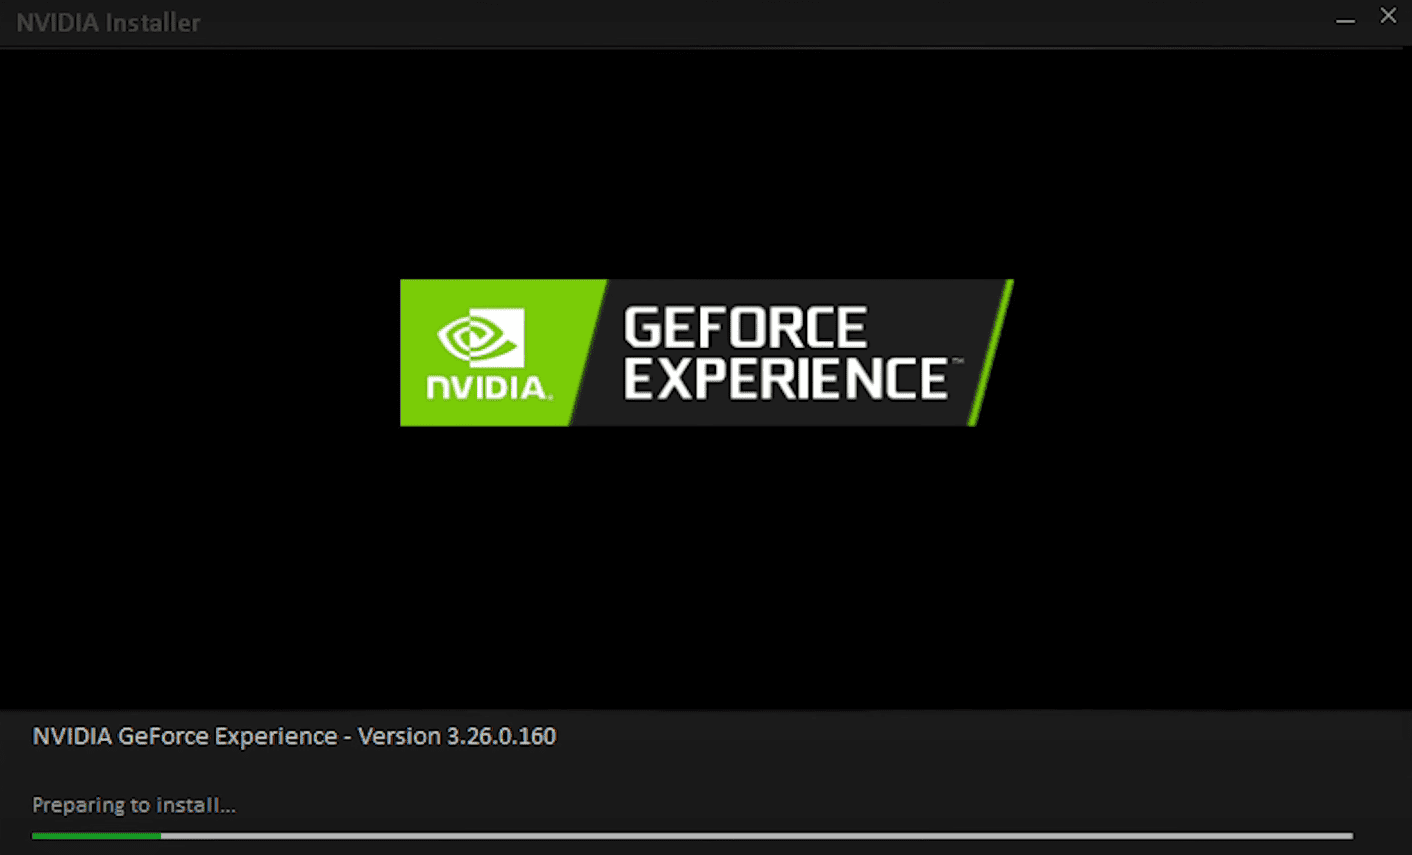
This closely resembles the “Geforce Experience installer cannot continue” error, for which I have created a troubleshooting guide available here.
By the end of this guide, you should be able to see the possible reasons behind it and troubleshoot the GeForce Experience not installing issue on a Windows PC.
Let’s start with the possible causes, shall we?
What Can Prevent GeForce Experience To Stuck At Installing?
Generally, when your Geforce Experience’s executable encounters compatibility issues with your Windows version or your anti-virus blocks for some reason, installation can stuck at the “preparing to install” phrase.
This problem may also arise if the installer lacks administrative privileges. In addition, the presence of corrupted Nvidia components such as remnants of previous installations within the system can pose a challenge to the Geforce Experience’s installation process.
You can rule out conflict between other services and applications to trigger installation prevention as well. Typically, a normal rebooting of the system and reducing the number of startup applications shorts out this issue.
How to Fix Geforce Experience Not Installing Issue?
There are four methods to address this problem. You can follow these steps in sequence and determine which one proves most effective for you.
1. Install GeForce Experience with Administrative Privileges
Providing admin privileges when installing Geforce Experience is relatively easy. Start with downloading Geforce Experience, Right click on the installer file you just downloaded: it should appear as “geforce_experience_vxx”.
Then select “RUN AS ADMINISTRATOR” from the context menu.
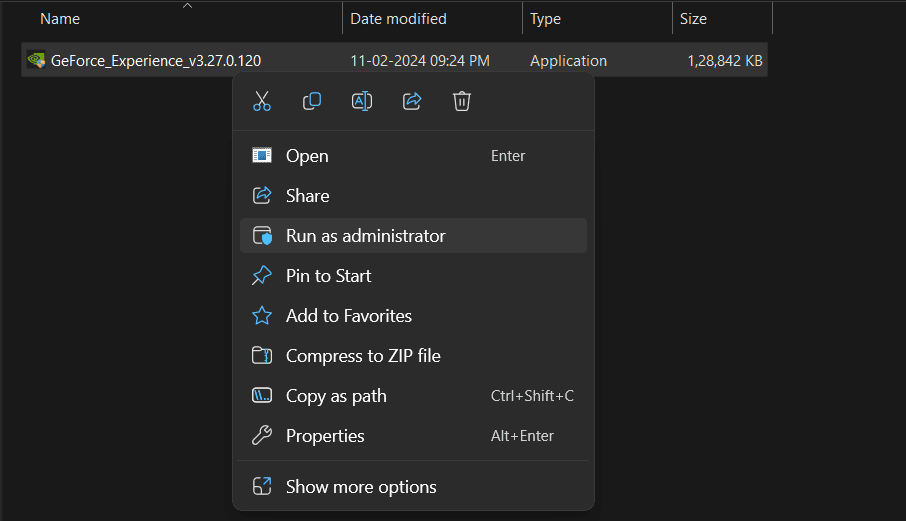
You can also levitate the privilege via RUN dialog commands. Follow this:
- Press Windows + R
- Copy the path to “geforce_experience_vxx” (select the installer executable and combine Ctrl + Shift + C to copy the path).
- Then hold down ctrl + shift and Enter to install it with elevated admin privilege.
Then you just need to follow the on-screen instructions to start the installation process. If it stuck again at the preparing to install phrase, move on to the next method.
2. Restart Your Computer
Restarting your computer is a quick and indeed a good troubleshooting step for installation problems. It can help eliminate temporary glitches or conflicts causing the installation issue.
Simply restart your computer to refresh system resources and run the GeForce Experience installer again after restart.
It’s better if you run it with administrative privilege.
3. Uninstall Everything Related to Nvidia
Another solution can be uninstalling any existing Nvidia-related services on your system (if there are any).
Open the Control Panel by typing “appwiz.cpl” into the Run dialog box (which you can open using the Windows key + R key combination).
Right-click and uninstall all the Nvidia applications installed on your system.

Once uninstalled, restart your PC. Then download the latest Geforce Experience release and try to install it. If your installation is stuck again, try updating the Nvidia driver using the device manager before installing the Geforce Experience.
4. Update Nvidia Driver
Services such as NVIDIA LocalSystem Container, NvContainerNetworkService, and Nvidia Display Container are part of Nvidia Graphics Driver. If your PC doesn’t have an instance of Nvidia driver Geforce Experience installation might fail in case it looks for these services or related components on the system.
Make sure you have the Nvidia driver installed by looking at your device manager. Open the RUN dialog box (Windows + R), type "devmgmt.msc” to open the device manager.
Expand the display adapter > Check if you have an Nvidia driver installed > If not, download & install it from the official site or else right-click and update the driver.
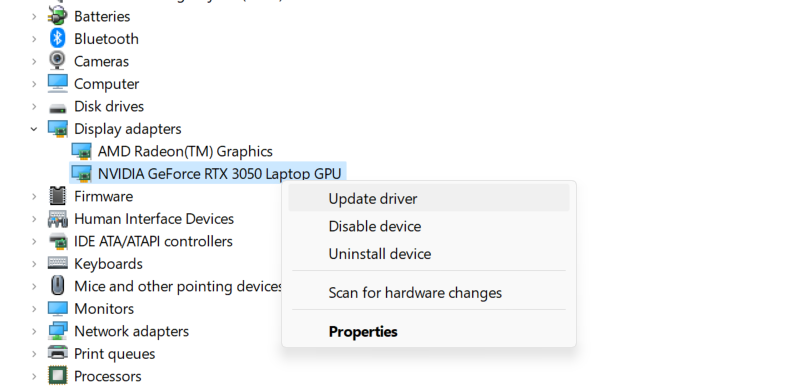
Next, choose the option to search automatically for drivers, and if your system doesn’t have the latest driver, it will download and install it. Afterward, reboot your PC.
Then try installing the Geforce Experience application.
5. Clean Boot And Update
Third-party utilities can prevent a smooth installation of Nvidia Geforce Application. You can prevent that by disabling 3rd party services.
Open the Run dialog box > type msconfig and press enter. The system configuration window will appear where you need to go to the services tab.
Then check the Hide app Microsoft services on the bottom left > then click on disable all.
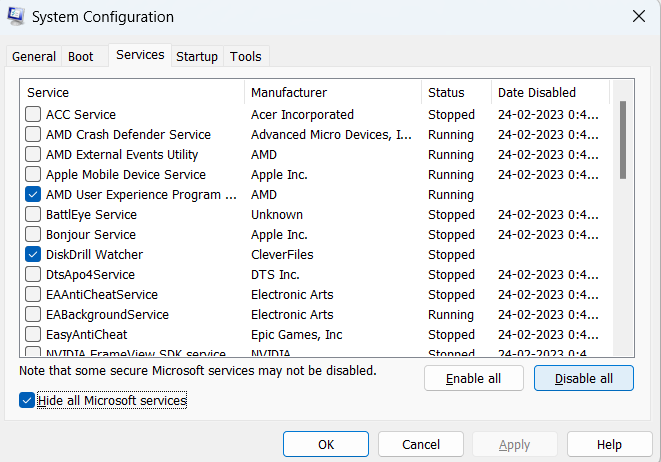
To apply this change, you must restart your computer.
Another way of disabling apps via Task Manager is by opening Task Manager > selecting the Startup Apps tab > disabling all startup apps with high start-up impact.
Once you restart the PC it will perform a clean boot, After that, install Geforce Experience. If it is still stuck in the “preparing to install” stage, allow GFE on Windows Firewall.
6. Allow Geforce Experience on Windows Firewall
Open the control panel > Search for system and security > Under Windows Defender firewall click on allow apps through Windows Firewall.
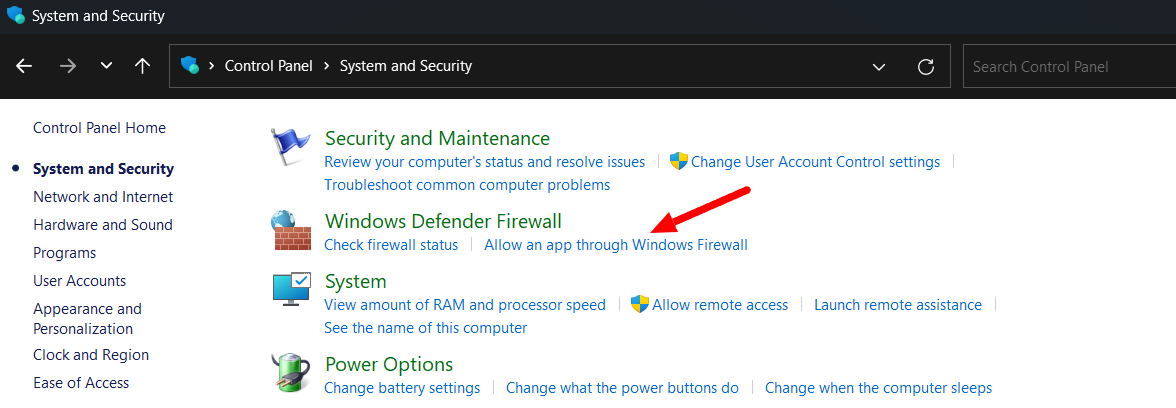
In the next window, you will see the application’s permission to communicate through Windows Firewall.
Click on Change Settings > then click on Allow Another App > Click on Browse > Then you will need to select the Geforce Experience installer executable and pass it for private and public permission.
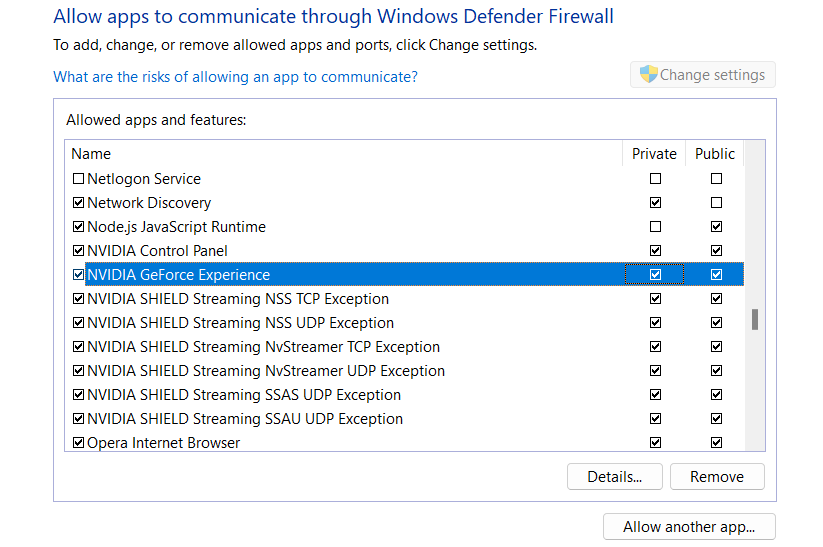
That should resolve possible issues related to Firewall hindering GeForce Experience installation.
7. Clean Install Geforce Experience
Corrupted files or remnants of previous GFE installations can cause issues and hinder the execution of the installation procedure for GeForce Experience.
DDU is a powerful utility that thoroughly removes NVIDIA, AMD, and Intel graphics drivers and related files from your PC. You can download it from the Wagnardsoft website. Extract the downloaded files.
Next, you need to close all the applications, especially those related to graphics (games, video editing software, etc.) Then disconnect from the internet to prevent automatic driver installations during the process.
Reboot your computer and enter Safe Mode, either by selecting Shift + Restart from the Start menu or by employing the Shift + F8 key combination during the boot process. Safe Mode guarantees minimal disruption from other processes.
Next, you need to launch DDU and select your graphics card manufacturer (NVIDIA in this case). Click on “Clean and restart” to initiate the removal procedure. DDU will uninstall the drivers, eliminate registry entries, and erase any remaining files.
Once DDU finishes its operation, your system will reboot into normal mode. You may observe a temporary decrease in display resolution. Here’s how to fix that.
Then download Geforce Experience from the official NVIDIA website and proceed with the standard installation process.
You may also read:
- How To Fix: GeForce Experience Login Not Working
- How to Fix Nvidia Graphics Driver is Not Compatible With This Version of Windows
- How to Fix NVIDIA Control Panel Display Settings Missing
- How to Fix: Geforce Experience FPS Counter Not Showing
Summing up:
Still unable to install Geforce Experience? Try updating your Windows. Typically, one of the above methods solves this issue, in case otherwise, you can also try to install a previous version of Geforce Experience.

