Nvidia graphics driver is not compatible with this version of Windows is one of the compatibility issues you may encounter with your Nvidia GPU.
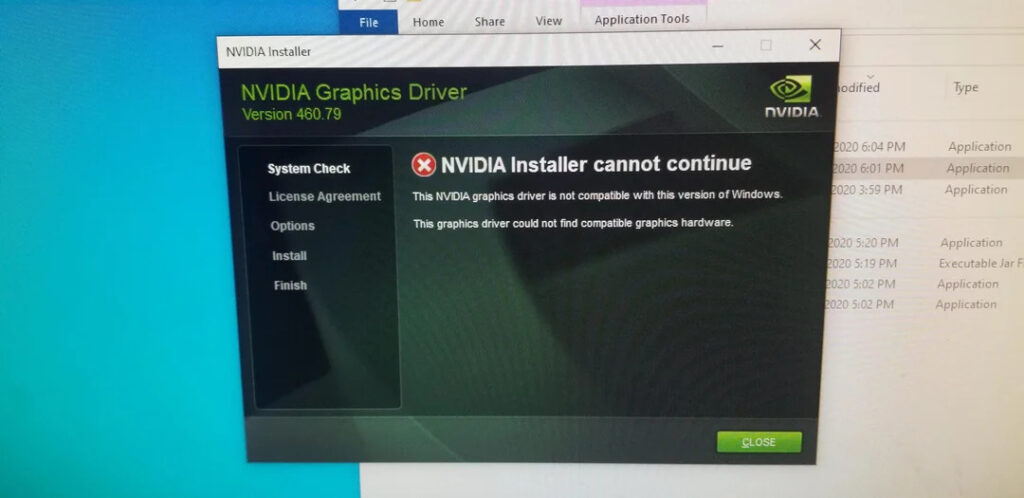
The error code indicates that the Nvidia graphics driver you’re attempting to install is incompatible with the version of Windows you’re using. You might see these error messages when you’re installing or updating your graphics driver, whether it’s a fresh installation or an update.
Here’s an example:
To troubleshoot this issue, you have to understand the possible causes of this issue. Let’s find out.
Why “graphics driver is not compatible with this version of Windows”?
When you’re trying to install an Nvidia graphics driver, it can hit a compatibility snag with Windows, especially if you’re installing a 32-bit driver on a 64-bit system or vice versa. It’s like they’re speaking different languages due to their distinct architectures.
So, basically, it means the graphics card and the operating system need to be on the same page for smooth driver communication.
Graphics driver incompatibility issues could also be related to the build version of your Windows. Nvidia drivers play nice only with Windows versions starting from Threshold 2 version 1511. But, if your Windows version is lagging behind 1511, you might need an upgrade.
To update Windows > head to Settings > Update & Security, go to Windows Update, and click on the “Check for updates” button.
If you’re on 1511 (Threshold 2), 1607 (Anniversary), or 1703 (Fall Creators), you’re in the clear. Also, anything past the 10586 version should work seamlessly with Nvidia drivers.
‘Graphics driver is not compatible with this version of Windows’ can also occur due to an issue with the driver you are trying to install.
Figuring out the exact problem can be a bit of a mystery, so troubleshooting it can give you a clear idea of what’s going on.
Troubleshoots: NVIDIA graphics driver is not compatible with this version of Windows
Check your Windows Architecture & Build Version
My go-to starting point would be figuring out the Windows architecture and ‘build version’ of the operating system. Once you’ve got that info, you can take a two-pronged approach: run the driver installer in compatibility mode and grab a compatible Nvidia driver from the official site.
Step 1: determine OS’s Architecture type
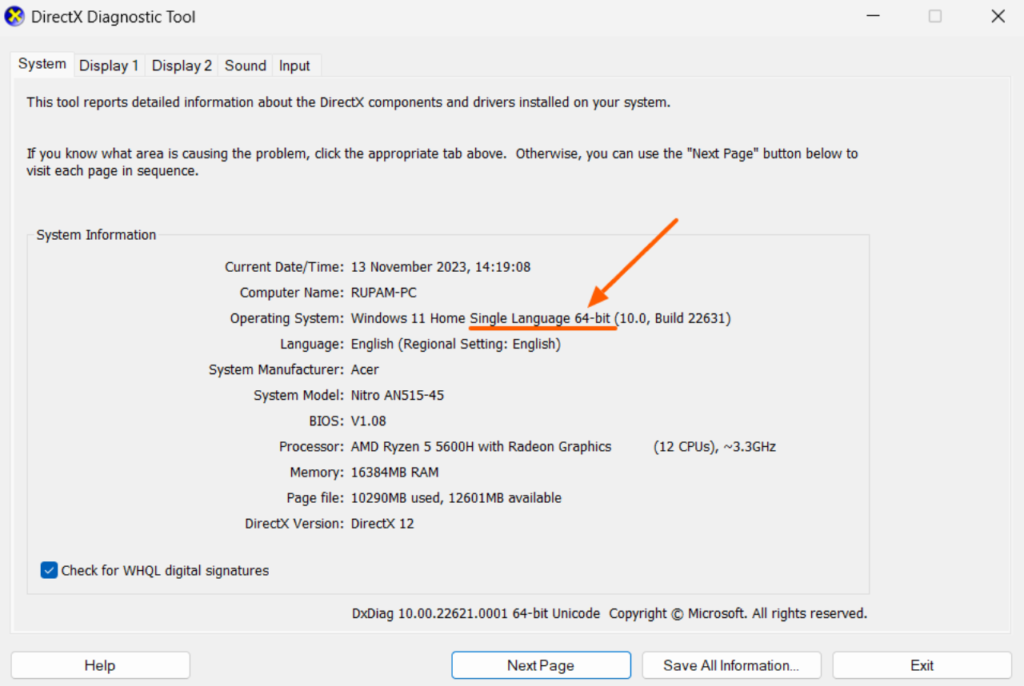
It’s pretty easy to find the operating system’s architecture type with the DirectX Diagnostic utility.
- Press Windows + R to open the RUN dialog box.
- Type “dxdiag” and press Enter.
- The DirectX Diagnostic window will appear.
- Make sure you are on the System tab, which should show your Operating System‘s architecture version as ‘system bit version‘.
Step 2: look for the build version
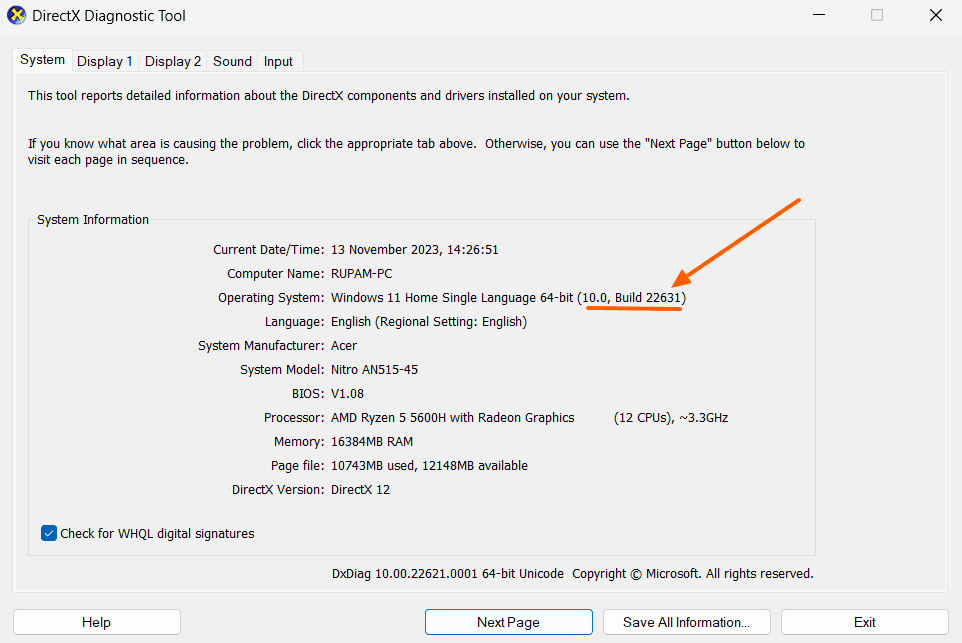
The build version, as I mentioned above, will help you figure out if your Windows is compatible with the Nvidia driver. You can find the build version pretty much the same way.
Just repeat the steps to open the DirectX Diagnostic utility, and look for the build version next to architecture information.
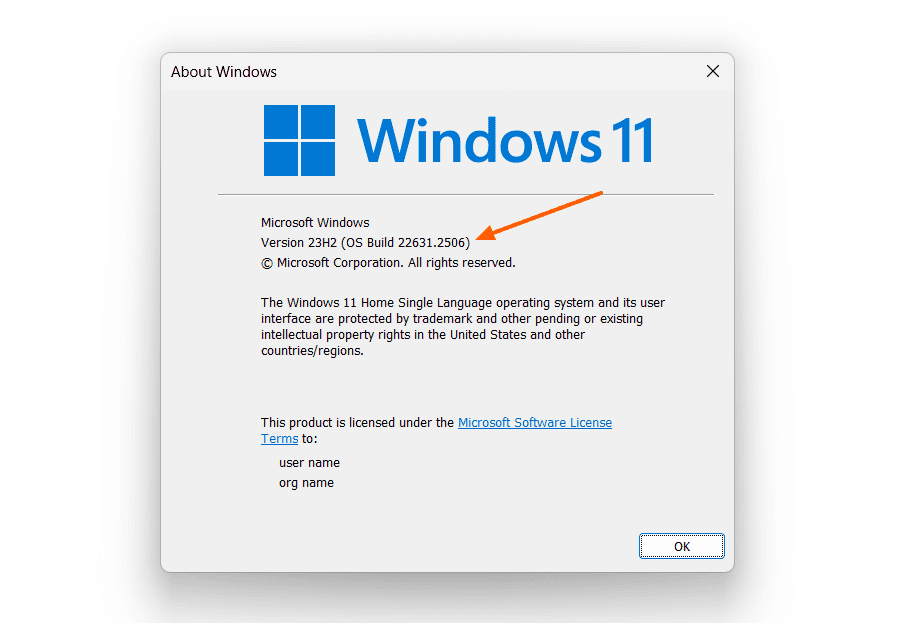
In case the DirectX Diagnostic utility not helping, use the “winver” command.
- Press Windows + R to open the RUN dialog box.
- Type “winver” and press Enter.
- The “About Windows” window will pop up; look for the Windows build version there.
Run the driver installer in compatibility mode
Now you know your Windows version and architecture, you can try running the driver installer in compatibility mode.
It’s a straightforward and safe solution that won’t mess with your data. This is a quick fix if you’re facing compatibility issues with the current version of Windows and the Nvidia graphics driver installer.
By running the Nvidia graphics driver installer in compatibility mode, you’re basically telling Windows to treat the installer like it’s working on an older version of the system.
Here are the steps to run the driver installer in compatibility mode:
- Right-click on the Nvidia graphics driver installer file and choose Properties.
- Navigate to the Compatibility tab.
- Tick the box that says “Run this program in compatibility mode for.”
- From the drop-down menu, choose the version of Windows you’re currently using.
- Click OK.
After going through these steps, try installing the Nvidia graphics driver again.
Download compatible Nvidia driver & install it
Here’s where the Windows architecture will help you. You should manually download the compatible driver with the compatible operating system (64-bit or 32-bit).
- Start by visiting the Nvidia driver download page.
- Use the form to select your GPU series, GPU model, OS version, and language.
- Make sure to pick the right operating system—select your OS according to the system architecture type.
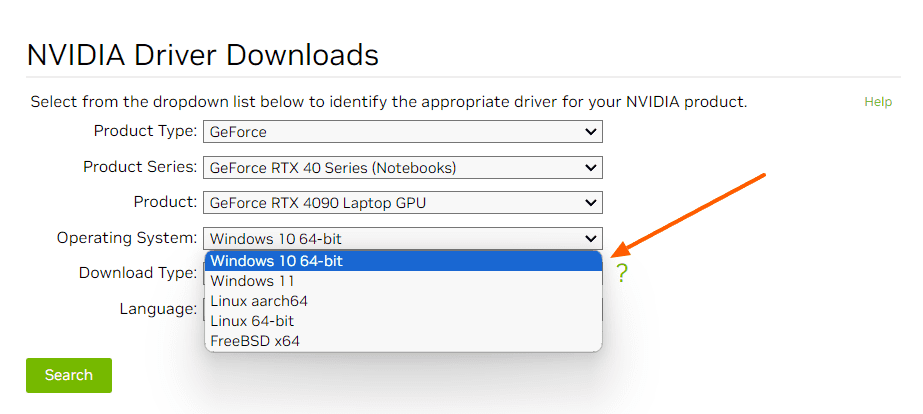
- Click on “Search” to find a compatible driver.
- Download the driver and install it on your PC. (a clean installation is preferable)
- If you didn’t encounter the “Nvidia graphics driver is not compatible with this version of Windows” notice during installation, that’s the fix.
If your system is 32-bit but can’t find the option to select a 32-bit operating system, try using this search syntax on Google: [GPU Model] driver for Windows 32-bit.
Use Geforce Experience to clean and install your driver
If manually installing the Nvidia driver didn’t help, you can try performing a clean installation of the latest driver using Geforce Experience.
For that, you must have the Geforce Experience application, if you don’t have it yet get it from the Nvidia website.
After installing the GFE app:
- Navigate to the Drivers tab located next to the Home option in the navigation bar.
- Select ‘check for update‘ if it’s visible.
- Should your system lack the latest driver, an option to download it will appear.
- Click on the download button.

- Click on custom installation. This will allow you to choose what components you want to install.

- When you see the components just make sure to check the ‘perform a clean installation’ option.
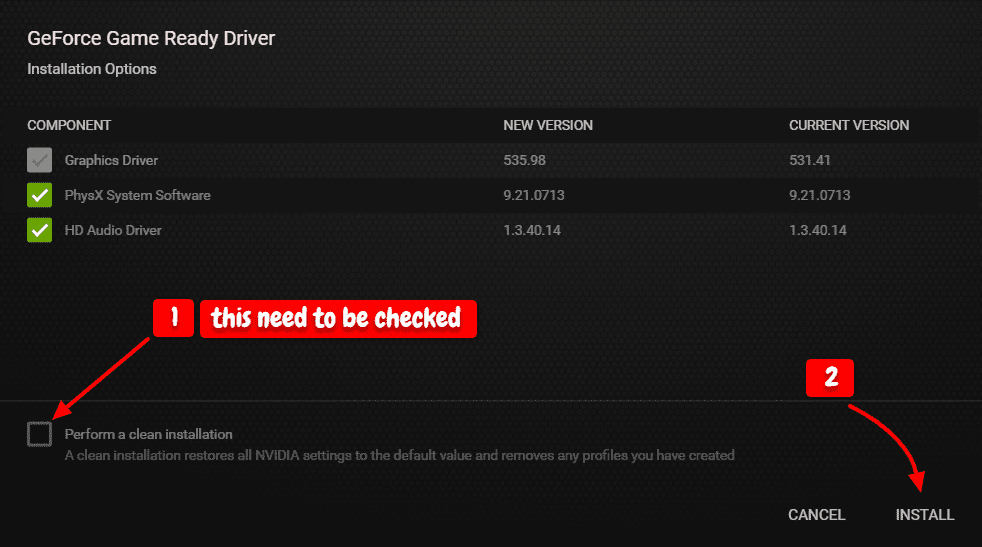
- This process will remove any residual unnecessary data and folders from the previous Nvidia driver installation and install the latest version.
- If the installation is complete, you must have avoided the “graphics driver is not compatible with this version of Windows” message.
Install the Nvidia Studio Driver
Installing the Nvidia Studio Driver which is generally considered to be more stable than Game Ready drivers, can help you avoid the ‘Nvidia graphics driver is not compatible with this version of Windows’ issue.
This is because Studio Drivers are designed specifically for professionals who need a consistent and reliable experience for their work. Studio drivers undergo more rigorous testing and are optimized for a wider range of creative applications.
You can download the Studio Driver with these steps:
- Visit the Nvidia website and choose your graphics card model.
- Ensure you select the accurate operating system type.
- Switch the download type to the Studio driver.
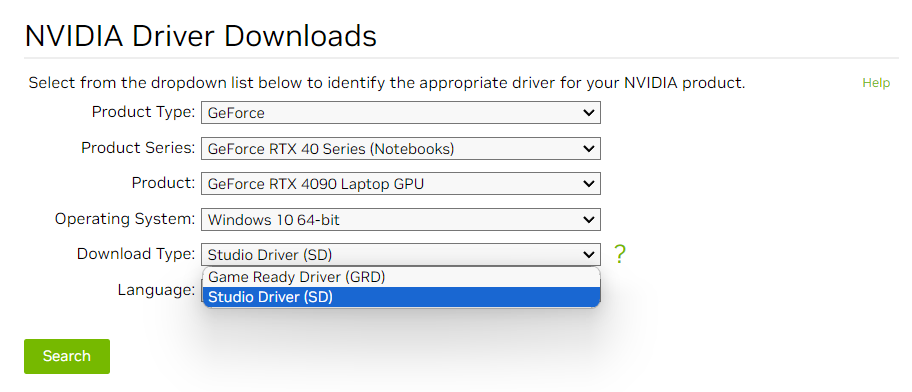
- Select the “Search” option and download the driver.
- Execute the installer and follow the on-screen prompts.
If your installation goes through, you should not encounter the graphics driver compatibility error again. Reboot your computer and see if the Nvidia driver working as it should be.
Related issue: How to Fix: Geforce Experience FPS Counter Not Showing
Time to update your Windows
I kept this to the last because it can be the most time-consuming. If your Windows version does not complement the Nvidia driver, you will have to update your Windows.
- Access Windows Settings by pressing Win + I. From there, navigate to Update & Security.
- In Update & Security, choose Windows Update and then click on the “Check for updates” option located on the right-hand side.
- If an update is found, Windows will initiate the download automatically.
It’s generally recommended to download all available updates to ensure your system is up to date. After the update try running your Nvidia driver installer. See if that fixes the “NVIDIA driver not compatible with this version of Windows” error.
Downgrade your Driver or Windows
If you have encountered this issue after a recent update you might want to test rolling back your Windows, as well as to the previous Nvidia driver.
Rolling back to the previous version of Windows can be done in a couple of ways:
Within 10 days of upgrading, it’s easier. Just follow these steps:
- Open up Settings.
- Click on “System.”
- Then, hit “Recovery.”
- Under “Go back to the previous version of Windows,” click on “Get Started.”
- Follow what pops up on your screen, and you’ll roll back to your previous Windows version.
But if it’s been more than 10 days since you upgraded, it gets a bit trickier. You’ll need to do a clean install of your previous Windows version using a bootable USB drive or DVD with the installation files. You can get the files from the Microsoft website.
Here’s what to do:
- Boot your computer from that bootable USB or DVD.
- Follow the instructions that come up to install your old Windows version.
Remember, doing a clean install means wiping out everything on your computer, so make sure you’ve backed up all your important stuff before starting.
Now, if you want to roll back your Nvidia driver:
- Open the Device Manager.
- Look for “Display adapters” and expand that category.
- Right-click on your Nvidia graphics card and choose “Properties.”
- Hit the “Driver” tab.
- Click on “Roll Back Driver” and follow the steps you see.
Once you’ve rolled back either your Windows version or Nvidia driver, test things out to see if the issue with the graphics driver not being compatible is fixed.
In case none of these steps solve the graphics driver is not compatible issue for you, try connecting to Nvidia support, the Windows community, and your PC manufacturer for further assistance.

